How to Paint Varnished Wood – Guide by Fantastic Services UK
Painting varnished wood sounds like an easy project that won’t take you more than a couple of paint coats. But in reality it’s amongst the trickiest painting jobs, and much can go wrong. Plus, there’s a lot of preparation around this task.
Sorry if we discouraged your DIY enthusiasm at the very beginning. We talked to one of the painting and decorating experts at Fantastic Services in order to bring you a comprehensive guide. So breathe deep! Because with this guide, you can refinish your varnish wood furniture without a single mistake.
If you are somebody who:
- doesn’t want to give up on old wooden pieces yet;
- is a daring DIY-er, willing to paint over varnished cabinets, table; antique objects or any of the high-traffic parts in a house;
- had a previous unsuccessful attempt, resulting in peeling or cracking paint and need to re-do the work;
- want to give a new lease of life of his yellowish-looking pine or oak wood.
Then you will find this guide quite useful because it provides a detailed look at each step in the process.
Without further ado, here is how to paint varnished wood and successfully renew its fresh look from the first time!
- Can I paint over varnish?
- Tools and supplies
- How to paint over varnished wood?
- – Cleaning
- – Fixing and filling the imperfections
- – Removing varnish
- – Applying primer
- – Painting
Can I paint over varnish?
The shortest answer is: YES, you can. Doesn’t matter what it is, varnished doors, furniture, staircases, cabinets, trims and so on. Just roll up your sleeve, prep for the task and be in a creative mood.
Actually, varnish wears out over the years and makes the imperfections even more noticeable and annoying. When you give the wood a new coat of paint, you don’t only make an aesthetic decision. You also provide colour, dust protection and enhance the durability of your furniture. So, if you got this attitude of creating a happy and eco-friendly living area, you will often have to paint your finished wood.
Tools and supplies you need before painting over varnished woodwork
Before getting into the nitty-gritty and start your furniture refinishing, make sure you pick up all necessary supplies and tools from the nearest hardware shop :
- lint-free rag (tack cloth);
- detergent or household cleaner;
- safety goggles, mask and rubber gloves;
- medium- to fine-grit sandpaper;
- the right primer;
- paint (different options available depending on the effect you want to achieve);
- a brush, roller or a paint sprayer;
- wood filler (if necessary);
- non-slippery, absorbing splatters, protective sheets.
If you lack the right equipment, experience and materials, don’t hesitate to book a professional painter and decorator near you to give your timber a new lick of paint. But when you are ready for action, read on! You’ll get a bunch of tips and tricks right from the Fantastic experts.

How to paint over varnished wood?
In the plethora of DIY tasks, painting varnished wood doesn’t need extraordinary skills. But remember: you have a problematic, slick surface to paint. So, when painting over varnished woodwork, you first need to overcome the tough adhesion and bonding challenges.
No worries! You can save loads of time and money with the following steps:
Step #1. Give a quick clean of the varnished wood
Firstly, preparing wood for painting need some cleaning. A clean working surface will make it easier to remove the varnish and will assure that dirt, grease and dust won’t mix with the primer or paint. All you need to keep your surface dust- and pest-free is described with the following steps:
- Spray a household cleaner on a clean, lint-free cloth to remove any dirt and grime from the surface.
- Dust it off and scrub off any sticky grease stains, debris, old furniture polish or residual until you see they are entirely removed. For hard-to-remove spots, try wiping them down with trisodium phosphate (TSP).
- Remove the damp cloth immediately after you cleaned the varnished wood. The varnish is not water-proof, so avoid extending the interaction time between the wood and wet rag.
- Next, wipe with a clean, dry cloth.
- Before going on, let the surface dry for a few minutes.
Step #2. Fix and fill in any small surface imperfections
When you have your varnished woodwork crystal clean, you can get a better and precise notion of its condition. Now, you can have a look at your old piece of varnished wood and ask yourself:
“Is the surface smooth enough?”
“Are there any dips, scratches or dents?”
Well, in 90% of the cases, you will have to eliminate some imperfections. Never miss that step, thinking that the paint will go well and cover up the irregularities. By doing this, you risk getting a lousy adhesion, flaking or blistering paint. To avoid undesired results, fill the scratches, holes or scrapes by using wood filler.
Though, it’s more complicated if you stumble upon larger cracks, missing chunks or rotten wood. Then, before doing anything, hire a professional carpenter to inspect the situation and restore the surface.
Step #3. Remove varnish from wood the right way
We know it’s tempting to add paint directly over the varnish. If you have ever asked yourself “Can I paint straight over varnished wood?”, the short answer is no. The problem is that paint won’t stick well when you paint straight on a varnished finish. Just imagine how it slides everywhere over the glossy surface…
Yes, stripping varnish from wood could be a daunting task. It requires muscles, know-how, experience and specialised tools to smooth the surface. So, depending on your time and skills, we suggest two options for stripping varnish from wood: sanding varnish off wood or de-glossing:
Option 1. Sanding varnished wood
A good sanding job is artistry. It gives finesse to your woodwork. So, if you really want the top coat to look perfect, the good old sandpaper is the best way to remove varnish. The resultant roughness will help to improve the paint’s grip and achieve a smooth and silky finish.
What is the best sandpaper for stripping paint?
- Medium- to fine-grit handheld sandpaper or a sanding block. Generally, they are suitable for flat and large surfaces, like varnished doors, table tops, etc.
- Contour sanding grips. They are best to restore the clean lines of trims, tricky edges and curved pieces.
You won’t go wrong if you bet on 120-220 grit sandpaper from the very beginning. If you don’t have previous experience and go with a “course” sandpaper, you risk ending up with marks, scratches, or even worse, ruining your wooden piece.
How to sand the varnish off wood?
When you have the right sanding tool, you are ready to start sanding. Now, here’s how to remove varnish from wood by using sandpaper:
- Get prepared. Before doing anything, ensure a well-ventilated environment. Not to mention, sanding releases a lot of dust in the air. So, make sure you protected your eyes and put on a mask or respirator on your mouth.
- Sand throughout the whole surface. The trick is to sand along the direction of the wood’s grain. Don’t press the sandpaper too much to achieve the desired result. If you are a novice, you can count the strokes to prevent overworking and breaking the grain or fluff up its fibres.
- Stop when you remove the varnished wood finish completely. To be clear, don’t sand down to bare wood. Things can get even worse. The idea is to form a good key for the well-bonding surface. Be warned that scraping old paint coats is only justified when the paint is flaking.
- Clean after sanding and before painting. Wipe off the resultant dust not only from the wooden surface but from the surrounding area.

So much dust after a few hours of sanding?
Learn how Fantastic Services can help you out!
Learn how Fantastic Services can help you out!”>Learn More
Too tedious? Keep on reading how to avoid sanding.
Option 2. Restoring the wood furniture without sanding
As a whole, if the surface is in comparatively good condition, you can use deglosser instead of sanding tools. Deglosser, also known as a liquid sander, helps to dull the old finish through a chemical reaction, making the varnished wood ready for priming.
When you are tempted to paint furniture without sanding or stripping, here’s how to use liquid deglosser:
- Use spray. Just spray a deglosser on a clean piece of furniture or other wood structure. Wait a few minutes according to the product instructions and wipe it off with a rag.
- Use sander deglosser. Pour the necessary quantity of liquid onto a cloth and run it over the whole surface with circular motions until the varnish disappear.
- Allow the surface to dry thoroughly.
Paint deglosser vs Sanding
Feel like you are in a dilemma? Firstly, think about how much time and effort you’re willing to put into the project. And if painting over varnish without sanding sounds more appealing and an easy-to-perform solution, think twice. Here’s why:
Pros and cons of sanding varnish:
- Chemical-free, inexpensive, very versatile way to remove varnish;
- Electric sanders make the job easier (but they can spread dust everywhere);
- Preparation of the surface according to the specific condition of the wood;
- In case you want to remove the colour, sanding would do the job better than a liquid sander/deglosser;
- Sanding increases the exposure to wood dust and has cancer risks. When you decorate an older home, lead-based paints or those containing fine & toxic particles may harm your health and pollute your home;
- Takes way too long time if you try to sand it down by hand;
- Messy experience;
- Intricate and troublesome areas need a detail sander (don’t ignore the risk of overworking the forms).
Pros and cons of de-glossing:
Low-VOC is available;
A faster, no-mess alternative to the sandpapers;- It can reach nooks and crannies without the risk of overworking the piece.
- Powerful chemical;
- Liquid sandpaper is a totally useless option in case of bumps, scratches or bad surface;
- Deglosser may leave you with a gummy look. You might need to sand the finish manually.
Step #4. Apply primer paint for wood
Do you really need to prime wood before painting varnished surfaces? Generally, you can paint wood without primer if the painted surfaces are intact and in good condition. Plus, you may not waste your time in priming the varnished surface unless you are switching between different types of paint or making a drastic colour change.
A first-class primer is an extra measure of safety. And it will help you meet your expectations of the durability of your paint. You can prime over paint to serve many purposes:
- sealing off the underneath surface;
- prevent the wood grain of showing through the top coat;
- stop the grain and knots from bleeding through the paint;
- achieve great adhesion between the surface and the top coat;
- reduce the number of top coats to get the real colour you want to see (especially, when you paint over dark stained wood);
- prevent the sheer look of the former paint (when you want a darker look of the varnished wood).
What is the best primer for varnished wood?
You will probably stop by the local DIY store and buy the first-seen multi-purpose primer at the painter store stand. But keep in mind that primers are very specific in their purpose. So check which is the most suitable wood primer for your varnished surface:
- Stain-blocking primer. If you don’t want to see even a sign of tannin, grease, and stains, the stain-blocking primer will do the perfect job for you. Don’t hesitate to use it when you have sanded a surface down to bare wood. A stain-killer primer will prevent the wood resins causing ugly dark blotches. It’s an excellent choice to use on pieces exposed to high humidity.
- Shellac primer. When you are in a real hurry, shellac primer is an excellent choice and a fast-drying option. Consider its application when you have to deal with severe odours, stains and wood surfaces exposed to exterior conditions. The only downside is the quite messy (and smelly) job you have to deal with. For those of you with no experience, shellac can leave marks, making the surface difficult for sanding and painting.
- Oil-based or water-based primer on varnished wood? Generally, it’s up to you. Mind that wood, even when painted, is porous. So, don’t be surprised if the water-based primer raises the grain. Though, don’t be afraid of this. You’ll only need to wait a bit more time until it gets fully dry. Then, lightly sand every coat you apply. Yet, the effect of oil – based primer is an excellent bonding surface (even if the smell is truly awful).
- The colour of the primer matters. When wood elements or furniture are white or in any pale colour, the white primer will create an excellent foundation. In the case of painting varnished wood in a darker shade, tint your primer to get the closer colour to your paint.
How to prepare varnished wood for painting with the appropriate primer?
- Clean the wooden surface and surrounding area from grime and dust.
- Prepare paintbrush, a foam paint roller or a spray. When you want to paint over a flat and large area, you can apply the primer with an easily-manoeuvring short-handle roller. That’s the way to avoid brush marks here and there. But always have in hand 1-2 inches of brush to go quickly over any intricate or tricky surface like trims, furniture, edges or corners. This way, you will avoid overworking the paint.
- Lay a coat of primer over the entire object. Strictly follow the instructions on the tin.
- Wait until the primer is fully dry. Drying time may vary for different producers. At a very rough estimate, 1 hour should be enough to go on with the second coat of primer.
- Hand-sand and continue with the second coat of primer. If you are wondering how many coats of primer to apply on varnished wood, usually, one layer will do the work. But when you are covering dark stain or varnish, we recommend applying two (or even more) coats of primer. In result, wood pigments won’t show through the top coat and prevent the appearance of stains.
- Let the second coat of primer dry overnight. The longer longer you let it dry, the better for your final goal.
- Use fine-grit sandpaper to give the primer a quick sanding. This will help you achieve a really smooth surface.
- Then, for best results, use a tack cloth to whisk debris even in the most hard-to-reach spots.
Your preparation work is well done. Now what?


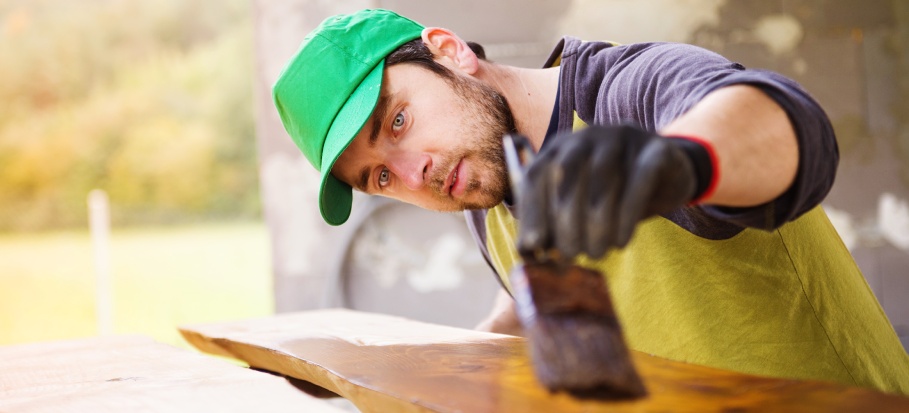
Step #5. Apply the paint to cover varnished wood
Once you’ve already cleaned the entire room, removed the transparent varnish layer and sealed the surface, you can finally start painting over varnished wood. Here is just one more thing to consider before you start painting.
What kind of paint to use on wood furniture?
To make the right choice of paint to cover varnished wood, follow these tips & tricks:
- Opt for water-based paint (acrylic/latex) for best and fastest results. No worries if you have already applied oil-based primer. You can coat with quality acrylic paint on oil-based primer, but not the opposite.
- Buy oil-based paint to achieve colour richness and a vibrant look. Keep in mind that these types of paints are notoriously slow drying. They need 8 hours to dry before recoating, as opposed to water-based paints which need around 4 hours before recoat.
- Use chalk paint over varnished wood. If you like the chick, ultra-matte vintage look, or you are not sure in your DIY skills, the adhesive chalk paint is the perfect choice for your wooden piece. Like a wizard, it will hide any imperfections over the surface with just a few strokes.
How to paint over varnish?
Now, take on a journey of inspiration and go with meticulous finishing strokes. Here are a few tricks for success in painting varnished wood:
- Before you start, make sure the primer is dry and produce smooth enough surface. If you have plenty of time, a week after priming varnished wood is a great period before stepping to the finishing touches.
- Go with the first coat of paint. Make even and solid strokes on the clean surface.
- Allow the surface to dry thoroughly and lightly sand between coats. This will help you to attain a seamless finish.
- Run your hand through the surface to check for any gaps or imperfections. If there is something you’ve missed, fill in, sand and touch them up.
- Lay a second coat of paint to completely cover the surface. Don’t risk getting an odd and uneven look at the end of the painting job. Allow at least 1 hour of drying time after the first coat. Then, get a flawless look of your wooden piece with a couple of paint coats.
- Finally, block a couple of days before you use your wooden furniture. This way you will prevent damages on your freshly-painted surface.
As you can see, painting varnished wood is pretty simple, providing that you have the necessary painting tools and applying the right techniques. It energises, motivates, and the result is totally worth it!
Need a professional-looking finish for your varnished wood?
Book a local painter to help you out!
- We’re certified:

Takeaways
If you don’t really like the distressed look of your old varnished wood, you will get a lot of satisfaction if you paint over it. But remember:
- No gloss before embarking on the project of painting varnished wood!
- The most time-consuming, least enjoyable tasks account for more than 80% of the work. If you are really serious about achieving a brilliant finish, you need to pass through the overall set-up process;
- Taking steps to refinish your varnished wood pieces will lighten your impact on nature, boost your wellbeing and give your piece a delicate and personal touch.
- In case all of this seems like too much work, you can always turn to a professional to handle the job for you.
Have you ever bought an object from IKEA that just needs that extra touch? Why not paint it to make it suit your home as best as it can? In our helpful post, we teach you how to paint IKEA furniture like a pro!
***
Feel confident? Now, it’s your turn to embark on your “no-fail” painting project. Let us know what your experience with painting varnished wood is.
Image source: halfpoint/depositphotos.com